- Radiation creates a list with timezone_aware datetime and radiation in µS/h.
- Photo reads DateTimeOriginal from photo.
- Photo.write_exif compiles new metadata object and writes exif tags to photo.
- Documentd changes in CHANGELOG.md.
- Changed Readme.me to match changes in code.
- Removed obsolete line from .gitignore
5.7 KiB
radiation tagger
rad_tag.py is a simple unix-style cross-platform Python 3 tool which can write certain tags to an image file.
It can scan a couple of images, extract their Exif-tags, and compare the DateTimeOriginal with other sources.
It can parse a .his (CSV) file from a GeigerLog file export and calculate the radiation in µS/h using the factor in sifactor.
Furthermore it can optionally read a gpx-file, compare the timestamps to 'DateTimeOriginal' and determine closest-matching latitude / longitude. If your gpx-file has times stored including the timezone, you can set --timezone to the local timezone, your camera / geiger counter ran at.
It then creates a UserComment with the actual measured radiation at the time the photo has been taken and writes the geocoordinates into the appropiate Exif tags.
Dependencies
Right now it depends on the following non-core Python 3 libraries:
- py3exiv2 A Python 3 binding for (lib)exiv2.
- boost.python3 Welcome to Boost.Python, a C++ library which enables seamless interoperability between C++ and the Python programming language.
- exiv2 Exiv2 is a Cross-platform C++ library and a command line utility to manage image metadata.
- gpxpy gpx-py is a python GPX parser. GPX (GPS eXchange Format) is an XML based file format for GPS tracks.
Requirements
- GeigerCounter log file in csv format as it is being exported by the software GeigerLog.
- A bunch of images (jpg, cr2, etc.) with its time of creation stored in
DateTimeOriginal
All sources are matched by their timestamp, so all sources have to be recorded during the same time (and timezone). The Geiger counter has to log a value every second, as the script compares the timestamps exactly.
These exported .his files look like this:
# ID  , time in isoformat  ,    CP/M,    CP/S
149654, 2020-02-27 05:12:42,    13.0,     0.0
Usage
usage: rad_tag.py [-h] [-si SIFACTOR] [-tz Timezone] [-d] [-g GPX]
                   [-o OUTDIR]
                   CSV Photo [Photo ...]

A unix-tyle tool that extracts GPS and/or radiation data from GPX/CSV files
and writes them into the Exif tags of given photos.

positional arguments:
  CSV                   Geiger counter history file in CSV format.
  Photo                 One or multiple photo image files to process.

optional arguments:
  -h, --help            show this help message and exit
  -si SIFACTOR, --sifactor SIFACTOR
                        Factor to multiply recorded CPM with. (default:
                        0.0065)
  -tz Timezone, --timezone Timezone
                        Manually set timezone of CSV / and Photo timestamp,
                        defaults to localtime if omitted. (default: None)
  -d, --dry             Dry-run, do not actually write anything. (default:
                        False)
  -g GPX, --gpx GPX     GPS track in GPX format (default: None)
  -o OUTDIR, --outdir OUTDIR
                        Directory to output processed photos. (default: .)
Examples
Use test.hisdb.his from current working dir and modify (overwrite) all .CR2 files in place.
./rat_tag.py test.hisdb.his *.CR2
Modifying photos in place (overwrite)
filename        date / time          Exif UserComment
DSC_0196.JPG    2020-03-03 18:33:33  NOT FOUND!
DSC_0197.JPG    2020-03-03 20:14:18  Radiation ☢ 0.15 µS/h
DSC_0198.JPG    2020-03-03 22:18:13  Radiation ☢ 0.07 µS/h
Use test.hisdb.his in folder 'testdata', read all .JPG files from 'testsource' and write them to 'testdest'.
./rad_tag.py testdata/test.hisdb.his -o testdest/ testsource/*.JPG
Modifying photos in testdest/ (copy)
filename        date / time          Exif UserComment
DSC_0196.JPG    2020-03-03 18:33:33  NOT FOUND!
DSC_0197.JPG    2020-03-03 20:14:18  Radiation ☢ 0.15 µS/h
DSC_0198.JPG    2020-03-03 22:18:13  Radiation ☢ 0.07 µS/h
GeigerLog setup
The Software is Open-Source and can be downloaded from Sourceforge.
Configure GeigerLog to use the GMC-Geiger counter
The GMC device has to be enabled in the geigerlog.cfg which is located in the main program directory. Because GS (GammaScout) is preactivated, it can be disabled, while you want to enable GMC
GSActivation = no
GMCActivation = yes
The GMC* defaults are quite sane, but you might want to set the correct serial port:
usbport = /dev/ttyUSB0
GeigerLog can also use a bunch of other devices while still outputting a csv-file in compatible format.
Using GeigerLog to download history
Now the program can be started by double-clicking geigerlog or by executing ./geigerlog on the command prompt.
Once connected to the device (in any power state) by pressing 'Ctrl+C' , you can download the history ('History' -> 'GMC Series' -> 'Get History from Device'). You will be asked to choose a filename for the hisdb-file (SQLITE format).
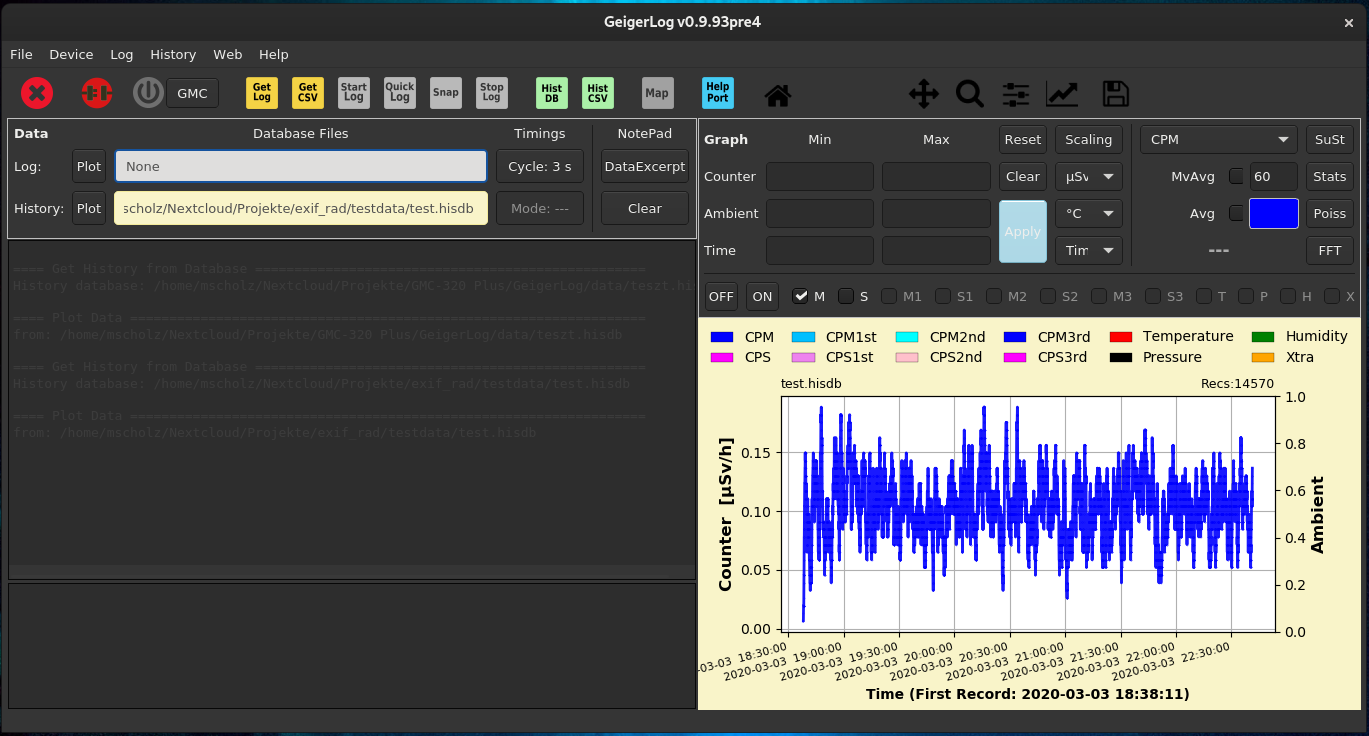
GeigerLog now presents you a rendering of the radiation over time in its main window:
Once imported, you can export the history into a hisdb.his-file, which is basically the CSV-file rad_tag.py can process. Choose 'History' -> Save History Data into .his file (CSV)'.
future possibilities
- It might get a setup.py if I want to waste my time on it.
- I might want to get rid of the requirement to use a bloated GUI application to download the history data off the Geigercounter. There must be a neat working command line tool. Maybe I'll write it myself.
